Video Transcript:
Hello
everyone, it’s Dale here.
In
this new video series, I want to break down my recent trades. The goal of this
series is to show you how I use my Volume Profile trading setups every day in
real market conditions, so you can learn from both my wins and my mistakes. If
you find this helpful, don’t forget to hit the like and subscribe buttons.
Let’s
dive in.
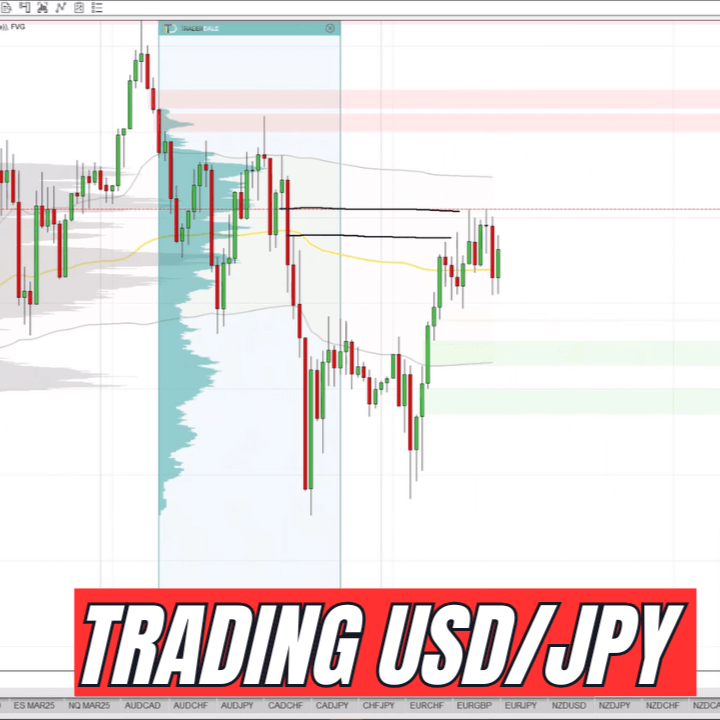
What
you see before you is a screenshot from my session yesterday. It’s taken from
the live trading room we held in the Funded Trader Academy.
During that session, a new setup was forming on the AUD/USD. This is the
AUD/USD on a 30-minute timeframe, and the new setup was forming right
here.
There
was a resistance level forming around 0.6364. The reason behind this
setup was based on a couple of factors. The main reason was a Volume Profile
setup. If you look here at what I’ve highlighted, this area represents a heavy
volume zone, which the resistance level was based on. You can see a small
rotation with heavy volumes, followed by a sharp sell-off. This sharp drop
indicated that sellers were building up short positions in that little rotation
before manipulating the price to push downward.
This
is one of my favorite Volume Profile setups, and I like to use it every day.
In
addition to that, there was also a price action setup. The price had reacted to
this zone in the past, meaning it acted as support. Since the price reacted
strongly in this area previously, it became a resistance once the support was
broken—a classic price action setup that aligned with the Volume Profile setup.
There
was also a fair value gap, highlighted in red here. This concept comes from
Smart Money Concepts, and I like to combine it with my Volume Profile setups.
The fair value gap began around this area. Normally, I prefer to place my
levels at the beginning of the fair value gap, which would mean setting the
level here. However, in this case, I placed the level slightly lower, at the
beginning of the heavy volume zone.
If I
had placed the level higher, based solely on the fair value gap, the stop loss
would have been very tight—about four pips—which isn’t enough. There was also a
risk that the price might react to the beginning of the resistance zone
earlier, missing the trade entry altogether. That’s why I decided to place my
resistance level and limit order at the beginning of the heavy volume zone
instead. This allowed me to set a stop loss of around 10 pips, which is
reasonable for AUD/USD.
Now,
let’s look at how this trade played out.
Here’s
the same chart again—AUD/USD, 30-minute timeframe. I’ve applied the
Volume Profile so you can see the volume zones. This was the heavy volume zone
where I based the level. Here was the pullback to that level, which acted as
the short entry. This was the stop loss, and this was the entry point. As you
can see, there was a beautiful reaction to the level.
My
take-profit target was here because it aligned with the first deviation of the
weekly VWAP, marked by the gray line. This allowed me to trade with a
risk-reward ratio of 1:1, which is what I generally prefer. If I had wanted to
be more aggressive, another take-profit target could have been this volume
cluster formed within the rejection zone. However, I took the first target and
was satisfied with that result.
This
was a solid reaction to a well-placed level. If I had placed the level at the
beginning of the fair value gap, it would have likely resulted in a missed
opportunity. I’m glad I trusted the heavy volume zone for this trade.
That’s
it for today’s breakdown. If you liked the video and would like to trade with
us every day, you’re welcome to join. Just head over to my website, Trader-Dale.com, and click the “FTA” button to
visit the Funded Trader Academy page. There’s a video on that page where I
explain everything included in the program. If you’re interested, you can also
book a one-on-one call, and we’ll walk you through the service to see if it’s
the right fit for you.
Thanks for watching, and I’ll see you next time. Until then, happy trading!